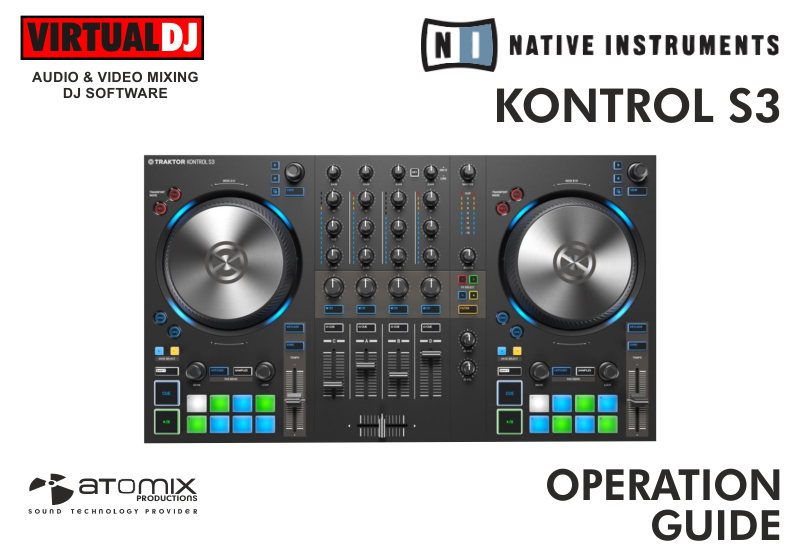
NATIVE INSTRUMENTS KONTROL S3
SETUP
Firmware & Drivers
Firmware : Update the firmware of the unit to the latest available version from https://www.native-instruments.com/en/support/downloads/drivers-other-files/
Drivers : No driver is required to be installed. The Traktor Kontrol S3 is a USB Class compliant device and your Operating system will automatically install the necessary drivers once the unit is connected to your computer via a USB port.
VirtualDJ 8 Setup
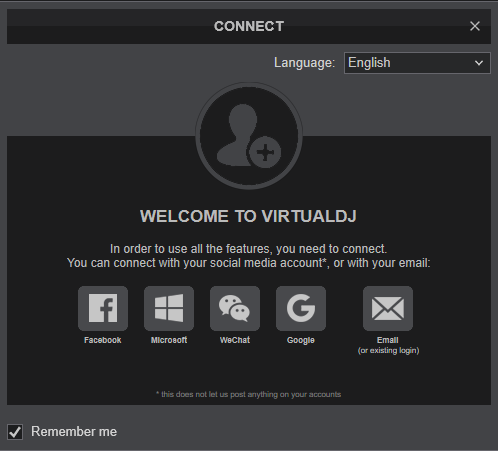
Once VirtualDJ is opened, a Login Window will appear. Login with your virtualdj.com account’s credentials.
A Pro Infinity, a Pro Subscription or a Home Plus License is required to use the Traktor Kontrol S3 Without any of the above Licenses, the controller will operate for 10 minutes each time you restart VirtualDJ.
http://www.virtualdj.com/buy/index.html
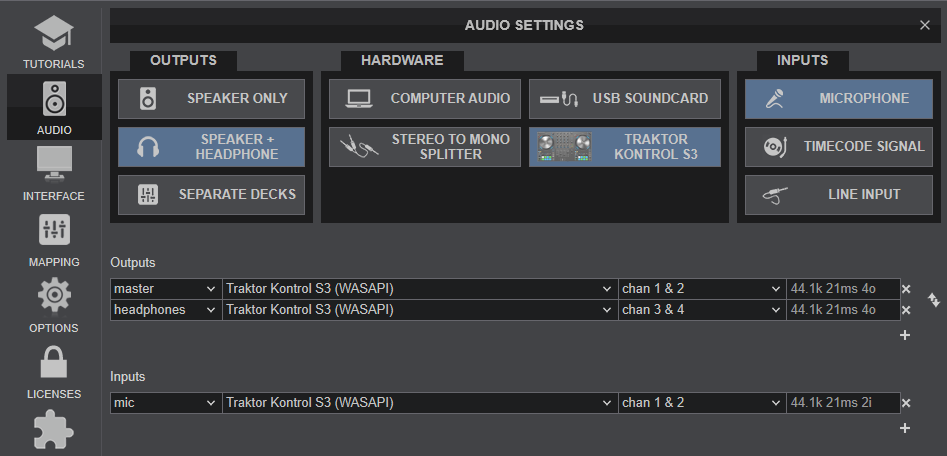
Select the Kontrol S3 button in order VirtualDJ to apply the pre-defined audio configuration (speakers need to be connected to the rear side of the unit in this case), or Computer if you don't have any speakers to connect to the Kontrol S3 and need to output sound from the default sound card of your computer.
Click to OK
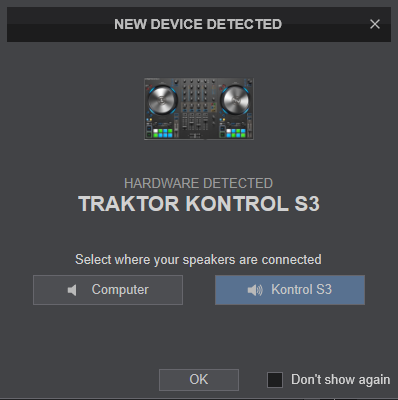
The unit is now ready to operate.
MIDI Operation
The unit should be visible in the MAPPING tab of VirtualDJ Settings and the “factory default” available/selected from the Mappings drop-down list.
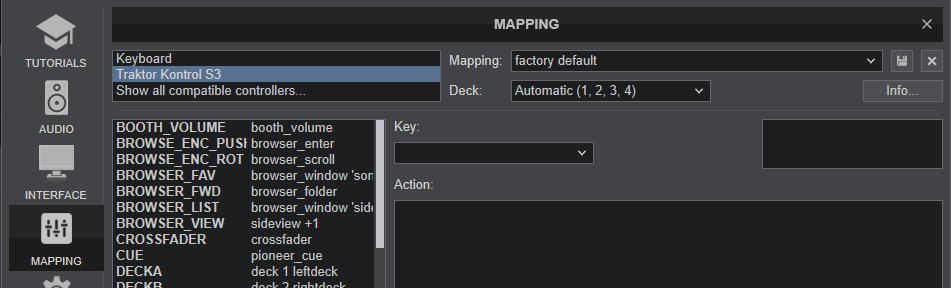
The factory default Mapping offers the functions described in this Manual, however those can be adjusted to your needs via VDJ Script actions.
Find more details at http://www.virtualdj.com/wiki/VDJ8script.html
AUDIO Setup
The unit has a pre-defined Audio setup and a special button in the AUDIO tab of VirtualDJ Settings to provide that.
For further software settings please refer to the User Guide of VirtualDJ 8.
http://www.virtualdj.com/manuals/virtualdj8/index.html
LAYOUT
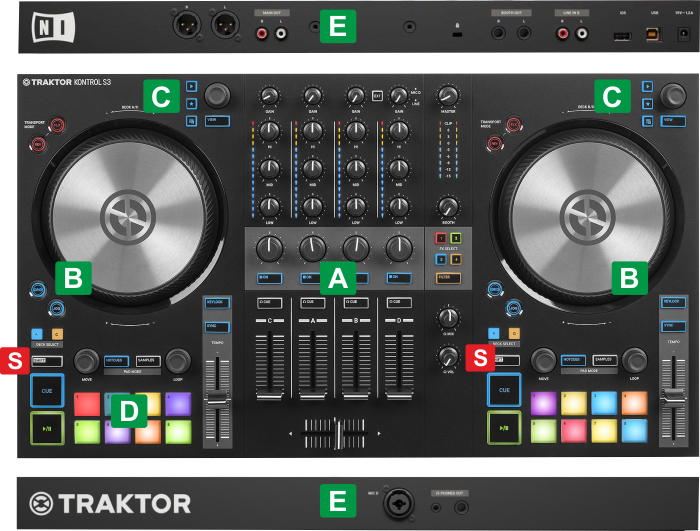
S SHIFT. Hold this button down to access secondary functions of the Traktor Kontrol S3
The functionality of each button, knob and slider per section (as shown in the image above) will be explained in detail in the following chapters
A. Mixer Controls
B. Deck Controls
C. Browser Controls
D. Performance Pads
E. Front & Rear Panels
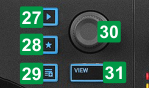
MIXER CONTROLS
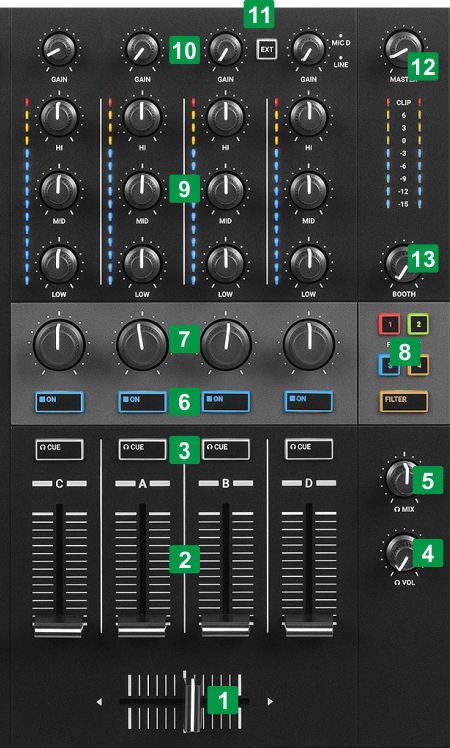
KEY
ACTION
SHIFT (SECONDARY) ACTION
FX 1 : Reverb Color FX
FX 2 : Loop Roll Color FX
FX 3 : Noise Color FX
FX 4 : Cut Color FX
FILTER: High/Low-Pass Filter
DECK CONTROLS
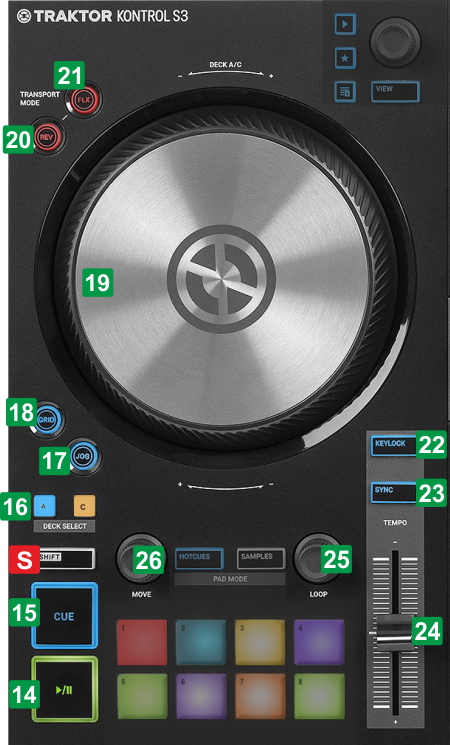
KEY
ACTION
SHIFT (SECONDARY) ACTION
When Vinyl mode is enabled, use the upper part of jogwheel to hold and scratch and the outer part to pitch-bend.
When Grid mode is enabled use the jogwheel to move the Beat-Grid in time.
If Slip mode is enabled, track will be playing in reverse while the button is held down and when released, will resume playing forward from the position the track would have been if the reverse was never triggered.
Push: Auto Loop. Press to enable/disable an Auto-Loop of the selected size in beats
Push: No action
Push: Reloop/Exit. Press to trigger the last enabled Loop. If in Loop, exit the Loop
Push: No action
BROWSER CONTROLS
Push to load the selected track in Browser to the Left/Right Deck.
Push to toggle between Normal and Zoomed Browser views.
PERFORMANCE PADS
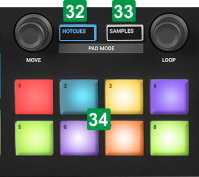
The 8 RGB performance Pads offer different functionality depending on the selected mode and the assigned Pads page. See further details in VirtualDJ Manual - Pads
KEY
ACTION
SHIFT ACTION
If in Hotcues, press again to set Pads to Saved Loops page (led will be lit green)
If in Sampler, press again to set Pads to KeyCue page (led will be flashing white)
Hold SHIFT down and then use the MOVE and LOOP encoders to adjust the Parameters of the selected Pads page (if available)
FRONT & REAR PANELS


